Youtube offers a range of fascinating features that provide
the user with a lot of convenience. One of the features that is interesting is
that YouTube plays every video in a sequence.
Perhaps you’re already acquainted with the feature. What we
mean is that when we click on the thumbnail to play the thumbnail, it will
launch the Youtube video will start running on its own.
How can Youtube play the next video in a way that is
automatic? This method will be explained here.
Overview of Autoplay Functions
Autoplay has been a popular feature as of the year 2017. It
allows users can preview of a video without needing to open the file. Other
features:
It will assist viewers to enjoy the next movie in accordance
with the history.
It is possible to enable the ability to view suggested
videos on autopilot.
Save time.
How can you get YouTube to play next video automatically?
How do you activate an autoplay function is simple and can
be utilized on a smartphone or a PC.
If you do, then take a an interest in the discussion on how
to turn off the autoplay feature in Youtube below.
#1. Using PC
If you normally utilize an PC to stream Youtube Naturally
you’re familiar with the autoplay feature.
This feature was originally activated on a computer rather
instead of the Youtube application was available on a mobile.
If you’re not sure how to turn it on, comply with these
steps:
Then, you should start Google Chrome or any other web
browser to start.
Then , go to the Youtube website.
Select only one video to use Autoplay.
On the right side, there will be an autoplay feature. If you
wish to enable it, you can select it to the right.
Done
Using the Youtube App
For those who prefer to use the Youtube application you can
also enable the autoplay feature.
Pay attention to the steps below:
In the first step is opening YouTube first. Youtube app
first.
Click on your channel in on the right side of your screen.
After that , scroll down and then click on then the Settings
menu.
Select then the Autoplay menu or the Autoplay menu.
If you are in the Autoplay next video menu, move to the
right to enable it.
Finished.
Once you have activated it, make sure to verify whether the
feature is working or not.
We all know Office applications to sort your work-related
tasks with timely accomplishments for the same. It enables the users to work
effortlessly and even allows you to set automatic replies on your Outlook
application.
You can without difficulty use the automatic replies in the
Outlook Web app on every occasion you want that human beings who are sending
you a mail be aware of that you will no longer be capable to reply to their
message shortly as you are away.
Here, in this article, you will get to examine the steps to
set
Automatically
reply in Outlook application. Remember, as soon as the
computerized replies are on they will be despatched to every of the senders. So
let’s start to learn how to set up the automatic replies on Outlook
application.
What are the steps to follow for setting up automatic
replies in Outlook?
Before discussing the steps the most important thing to
remember is that you can turn on, turn off or modify the automatic replies in the
Outlook applications. To set the automatic replies to follow the steps
on-screen:
Now enter the credentials associated with the account and
then tap on the “Sign In” button.
After this, you have to select the “Settings” option and
then choose the “Set automatic replies” option.
You can additionally pick out the “Settings” choice and then
go to the “Options” accompanied by way of “Organize email” and then “Automatic
replies” option.
How to use the automatic replies for your related
information?
In this section, you will get to learn which automatic reply
option stands for the relevant information that you want to send the sender.
Don’t send automatic replies: For this, you need to select
this labeled option to turn off the automatic replies.
Send the automatic replies: You can choose this option to
turn off the automatic replies.
Send replies during a specific period: Just select the
checkbox and then set a specific time frame to control the automatic replies.
If you do not set a time your automatic replies it will remain until you turn
off.
Send a reply to every sender in my agency with messages: For
this, you simply have to use the textual content container to create a message
that is solely despatched to the senders in your respective organizations.
Send an auto-reply message to the sender outdoor my
organization: For this, you want to choose the checkbox that you desire to ship
the senders backyard the organization. From the list available, you can choose
“Send replies to all external sender” option. Doing this, you can ship the
exterior senders.
Send a reply to each sender outside the organization with
the following message: If you select the option labeled as “Send replies to all
external senders” option.
Note: There are more
commands that are available on the official website. You can go to the internet
site to examine the instructions alongside with the methods to do it.
In a conclusive viewpoint:
It is important to learn the steps to set automatically
reply in outlook app so that if you are not working around then your senders
get the message. Remember, you can
always get the best guidance from the office experts and professions from the
Customer support page via the official website office.com/myaccount.
MS Lync, also known as MS Office Communicator, is designed to be compatible with MS Office applications. MS Office services are designed to make it easy to use business programs and communicate with others. Many Lync users have problems with their user status. This article will help them. After five minutes of inactivity, the user’s status changes automatically to “Inactive”, and then to “Away” after five minutes.
You can keep your status active if you’re not available during business hours if you are concerned about clients, contractors or the boss. This article will show you how to keep MS Office Lync active without bringing your boss to mind. Let’s get to the point without further discussion.
What steps can be taken to ensure that the Office communicator is always in active mode?
This section will show you how to keep your Office communicator active. This is essential to ensure that the professional aspects of your office are maintained without any issues. You must follow these instructions to ensure that the Office communicator is always active and functioning, even when you’re not working.
To begin, tap on the Gear icon in the upper right corner on the MS Communicator and MS Lync applications.
To complete the process, click the “Options” button in the drop-down menu.
To view the relevant Lync status options, tap the "Status” option in the right-hand side menu.
Simply tap the button "Show Me as Inactive if my computer is idle for more than 60 minutes” and then click on the up arrow.
Next, adjust the arrow button until it reaches the maximum value and the 360-minute limit.
Tap on the “OK” button to complete the process and save your changes.
To verify that everything is working properly, restart the app. To check the status of the app, you can keep it inactive for a while.
In a conclusive viewpoint:
This article should help you keep MS Office Lync online even if you are not available or working. If you have any questions or are having trouble with the steps, you can visit the official website. The Customer Support team is available to assist you with any questions or concerns. The professional experts are available for assistance 24 hours a day.
Users who have been using the
Outlook application from Microsoft for some time are aware that it does not
have the ability to control the time when messages are sent out. It’s
crucial to understand that Outlook’s app will send emails instantly
that isn’t the best choice for most of users. In this article, we’ll
explain why it is crucial to control incoming email messages in MS Outlook and
how can accomplish this. Without further delay, we will begin our discussion
on the subject!
Why is it important to have control
over the email messages that are delivered via Outlook?
There are numerous reasons to not
send out emails immediately. Here are the top reasons
If you let the email to be kept for
an additional few days or even minutes, it will provide you with an opportunity
to go through the contents.
Certain conversations are between
them and the sending of emails without having the answer will not be considered
professional.
It can slow down and prevents
playing the game of email tag.
It’s very simple to unleash an angry
or a rigid response during the course of a heated debate Giving it a bit of
time will help to calm the atmosphere. Hit on www.office.com/setup
How Can You Manage The Emails That
Are Sent Out Via The Outlook Application?
There are methods to get in place a
system of control over the emails that are that are sent through the Outlook
application. Here are some ways to aid you:
You can turn off the default
setting: One of the easiest methods is to know when the email will be sent is
to forward it to yourself. However, you must disable it first.
Click onto the “File” tab
and select the “Options” and then choose “Advanced” in the
window.
Under the “Send and
receive” section Click at the “Send/ Receive” button.
Remove the options beneath those
settings of Group which are identified by"All accounts" or “All
accounts” option.
Select the specific groups in the
event that they are highlighted.
Click to the “Close”
button and then press the “OK” button.
Delay all mails come are in. the
queue that is outgoing:
Click onto the “File” tab
and double tap on the “Manage Rules & Alerts” button.
You can also pick from the
“Manage Rules & Alerts” dropdown under the “Move” group
on the “Home” tab.
Click on the “New Rule”
button.
Within the section for Start Blank
Rule, you have to choose"Apply rule on messages" and then click the
“Apply rule on messages” option. Then, tap the “Next”
button.
Within the Wizard window don’t
select any of the options. The lower window will show the “Apply This Rule
After I Send The Message”.
Press"OK". Click on the
“OK” button without changing anything. If outlook prompts users to
verify the rules, click on"Yes" to confirm “Yes” button.
Next window, look for to see the
“Defer delivery by a number of minutes” section.
Click on the number of minutes
button and then type in your number in minutes, and click the “OK”
button.
The link will now show the minutes
that you typed in.
Click onto"Next.
“Next” option.
In the last window, you must give
the rule a title and click for the “Turn on this rule” option.
Choose"Create a rule on all
accounts" or “Create this rule on all accounts” in the event
that this is what you’re after.
Click on the “Finish”
button and then tap the “OK” button when you are ready to set up the
rule.
It is quite possible that you’ll
choose to defer the delay.
A single message can be delayed If
you’re contemplating disabling the automated messages , you can delay
individual messages. It is a good thing that the procedure is extremely
flexible. these are the steps you must follow:
Click onto the “File” tab
and then select “Options” and then tap on the “Advanced”
button.
In the Send and Receive section,
make sure to make sure you select for the “Send Immediately when
connected” option.
Select"OK" to open the “OK”
option.
Conclusive:
After reading this article we hope
you have a better understanding of the instructions that are provided
throughout this piece. If, however, you are still unsure of the steps that
need to be taken, you should go to the official site or go to the
office.com/myaccount to get assistance and advice from the customer service
team of experts on hand.
People who have used the Outlook application from Microsoft for years are aware that the app has no control over the time when messages are sent out. It’s crucial to understand that Outlook’s application will send emails instantly and isn’t an ideal choice for a lot users. In this article, we’ll examine the reasons why it’s important to control incoming email messages in MS Outlook and how can you achieve this. Without further delay, we begin discussing the subject! Office.com/myaccount
It is crucial to have control over the email messages that are delivered via Outlook?
There are many reasons to not email immediately. Here are a few reasons to avoid sending emails immediately:
If you let the email to remain for an additional few days or even minutes, it will provide you with the opportunity to read the contents.
Certain conversations are between them and emailing without understanding what the answers are is not considered professional.
It is slower and stops playing the game of email tag.
It’s quite easy to respond with an anger or rigid responses during the discussion. Giving the situation time to calm down the discussion.
How can you manage the email sent by the Outlook application?
There are methods to get in place a system of control over the emails that are that are sent through the Outlook application. Here are some ways to assist you:
You can deactivate the default settings: One of the most straightforward ways to find out when an email will be sent is to email the email to yourself, however you have to deactivate the email first:
Click to the “File” tab and select the “Options” and then choose “Advanced” in the window.
Under the “Send and receive” section click to the “Send/ Receive” button.
Check the 3 options beneath those settings of Group which are labeled by"All accounts" or “All accounts” option.
Choose the specific groups in the event that they are highlighted.
Click onto the “Close” button and then press the “OK” button.
Relay all messages come are in. Outgoing queue:
Click onto the “File” tab and double tap on the “Manage Rules & Alerts” button.
You can also select to select the “Manage Rules & Alerts” dropdown within the “Move” group on the “Home” tab.
Tap the “New Rule” button.
The Start rule blank section is where you have select"Apply rules to messages. “Apply rule on messages” option, then tap the “Next” button.
The wizard’s window will appear, don’t choose any option. The lower window will display “Apply This Rule After I Send The Message”.
Select"OK" or the “OK” button without changing anything. Once outlook asks for confirmation, click on"Yes" to confirm “Yes” button.
Next window, and check in the “Defer delivery by a number of minutes” section.
Click on the link that says “number of minutes” and then type in the amount of time you want to count and click the “OK” button.
The link will display the minutes that you typed in.
Click onto"Next. “Next” option.
In the last window, provide the rule a name , and select on the “Turn on this rule” option.
Choose"Create a rule on all accounts" or “Create this rule on all accounts” in the event that this is what you’re after.
Click on the “Finish” button and then tap the “OK” button when you are ready to make the rule.
It is quite possible that you’ll choose to defer the delay.
A single message can be delayed If you’re considering disabling automated messages , you can always defer individual messages. The process is very flexible. these are the steps you should follow:
Click on"Options. “Options” tab in the new window for messages.
Under the “More” options group, click on the Delay Delivery option.
In the Delivery options section, and set the date and the time that outlook will be able to send out the email.
If you decide to send the message prior to the time scheduled, simply remove your “Do not deliver before” option.
Send an email following connection After connecting: If of Outlook, you save messages to your “Inbox” when you exit the Outbox, Outlook that can send them out when you open it again Here are the steps you must take into consideration:
Click onto the “File” tab and then choose the “Options” and then tap on the “Advanced” button.
In the Send and Receive section, make sure to select on the “Send Immediately when connected” option.
Click on"OK. “OK” option.
In a conclusive viewpoint:
After reading this post we hope you’re now familiar with the instructions which are outlined throughout this piece. If, however, you are not sure with the instructions to follow, then it is suggested that you go to this official web site, or the www.office.com/accountfor help and advice from the customer service team of experts on hand.
The EPS files can be considered the predecessors to the PDF files. They have
image formats that were created and set by Adobe in early 1980s. The EPS
files are not used or available in modern times. There are better
alternatives, but you can still access these files if they are important to
you.
You will need to use Word if you have an EPS file. Word can’t access these
files. You can access these files by installing the word
application. Let’s talk more and get started! click here - Office.com/setup
What is an EPS File?
It is important that you recognize that the EPS file format can be better
described as Encapsulated PostScript. Adobe created it in 1992. It is a
standard graphics file format with a low resolution preview of graphics. This
makes it easy to access with programs that are not capable of editing the
inside code. Publishers love the EPS file format because it is compatible
with various operating systems.
How Do You Install The EPS Files
Within The MS Word Application?
To install the EPS files, there are a few steps you must follow. To
avoid any interruptions, please follow these steps:
All MS Office programs that are accessible currently should be closed.
To access the Windows Control Panel, open the Windows Control Panel and tap
on the “Start”.
You will then need to click on the “Add or remove Programs”
button.
Simply search for MS Office version in the list and highlight it.
To proceed with the installation of the EPS file, tap on the “Change”
button.
Navigate to the wizard and tap the "Expand Microsoft Office” option
from the "Features to Install” list.
You will then need to click on the “Converters & Filters”
option.
Click on “Graphics Filters” to continue.
Select the “EPS” filter that you want to add.
To install the filter, click on “Run all from your computer” and
then “Update”.
After the process is complete, MS Word can import the EPS files as graphics.
We hope this article gave you a brief overview of how to install and access
the MS Word EPS files on your devices. If you have any questions or need
more information, we recommend that you visit the Microsoft Office product
support website at Www.office.com/setup or Office.com/myaccount. Technical assistants will provide you
with the right set of instructions and guidelines.
PowerPoint’s
dangers are due to the ease with which PowerPoint is used (sadly). Microsoftmade PowerPoint look and function like Word and Excel, so that PowerPoint is
used by more people than Microsoft could have ever imagined.
These
guidelines will help you tackle this issue and create an innovative
presentation.
An outline of
Create
your presentation on paper using Notepad or Microsoft Word. If
you don’t allow backgrounds or multimedia to distract you, your lecture will be
more focused. Once the outline is complete, you can move it to
PowerPoint so that all the great stuff can be done.
Take a look at the background:
Avoid
using bright backgrounds and other shocking colors. Avoid
using bright backgrounds as backgrounds. No matter
what color or image you choose for a background, ensure it is easily readable
on slides.
Color combinations are another important area of play:
Even
though this topic is complex, it’s important to choose appealing and practical
combinations. To promote
the corporate identity of your customer or end user, you can use corporate
colors. For a sophisticated effect, try black and white!
Keep readable font sizes at
Many
great presentations were marred in part by 20-line paragraphs that no one could
read. If you must use a lot text, please
don’t do it the other way. Instead, include dark text on a dark background.
Avoid using long sentences:
Your
sentences can be broken up into smaller points. You
can experiment with line spacing options for your text boxes.
Avoid using ALL-UPPERCASE within a sentence, if it is not necessary.
You
will appear to be screaming if you don’t type an enterprise name or product
name.
There
have been many great presentations that were made without clip art. The
general trend is to use subdued images and collages rather than comic art.
Optimize and resize images using an image editor like Photoshop:
You
shouldn’t insert a PowerPoint image on a fourth screen, then resize it.
Here are some common solutions to fix the issue of Outlook
not receiving emails on Windows 10/11: Office.com/myaccount
1.
Check Internet Connection: Make sure
your internet connection is working and stable. Check if you are able to access
websites or other online services.
2.
Check email account settings: Verify
that your email account settings are correct in Outlook. You can access the
settings by clicking on File -> Account Settings -> Account Settings.
Check if your email address, username, and password are correct.
3.
Disable Firewall and Antivirus
temporarily: Firewall and antivirus software can block incoming emails in
Outlook. Temporarily disable them and check if you start receiving emails.
4.
Update Windows and Office: Make sure
your Windows and Office software are up to date. This can help fix any bugs or
compatibility issues that may be causing the problem.
5.
Repair Outlook: You can try
repairing your Outlook installation to fix the issue. You can do this by going
to Control Panel -> Programs and Features -> Right-click on Microsoft
Office -> Click on Change -> Select Repair.
6.
Disable add-ins: If you have any
add-ins installed in Outlook, they may be causing the problem. Disable them and
check if you start receiving emails.
7.
Delete and recreate email account:
If the above steps do not work, you can try deleting your email account and
then recreating it in Outlook.
8.
Contact your email provider: If you
continue to face issues, you can contact your email provider for assistance.
They may have information about any ongoing issues or maintenance work that may
be affecting email delivery.
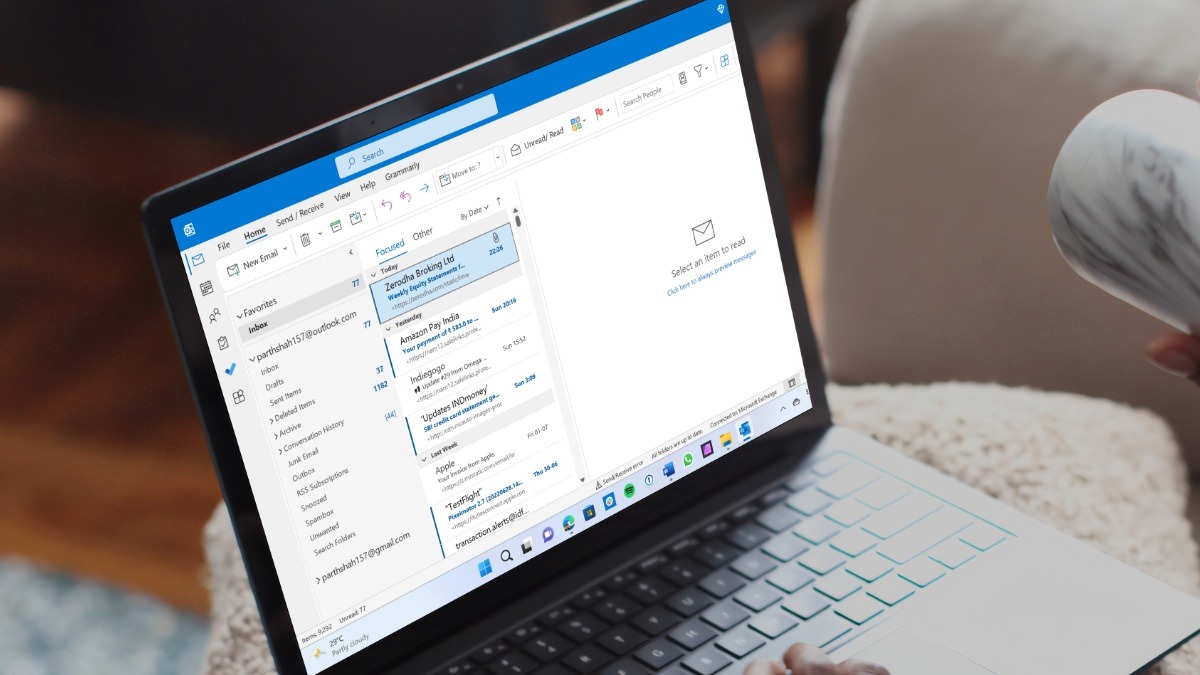
Outlook is one of the best email
service providers. Its number of users is increasing day by day due to its
amazing features. One such feature is the Outlook email client search tool. It
allows users to search for a particular detail in an email such as date,
folder, the sender, and more. But due to several reasons, your Outlook search
tool may not work. If you are going through the same Outlook issue and looking
for solutions to fix Outlook search not working on Mac then, this is the best
guide to go through. The detailed guide takes you through the reasons and most
effective solutions to the issue.
However, before jumping into the
solutions, let’s check out the reasons for the Outlook Search function not
working issue. Office.com/myaccount
Why Outlook Search is Not
Working?
If you are searching for specific
information in an email and Outlook is not showing emails or results based on
your search then, there must be a problem with the Outlook search engine. There
could be several reasons for such an issue in the Outlook account, some of the
most possible are listed below:
Windows search feature is turned
‘Off’.
Issues in Windows Indexing
Service.
Outlook ost file is corrupt or
damaged.
An outdated Microsoft Office.
There can be many other unknown
reasons for this issue. However, irrespective of these, you can fix this
Outlook search not working issue in no time by following the below-mentioned
solutions.
What to do if the Outlook Search
is Not Working on Mac?
There are various effective ways
to deal with the Outlook search not working on Mac issue. This section contains
all of them. Read and implement one by one. The methods are for Outlook 2016,
365, 2010 and 2013 versions. Www.office.com/myaccount
Solutions 1
Fix Windows Indexing Service
If the reason behind the why
Outlook search not working problem is a particular system error in Windows
indexing service, then you need to rebuild the service by implementing the
enlisted steps:
Open your system and go to the
‘Control Panel’.
Double-click the option of
‘Programs and Features’.
Click on the ‘Windows Features’
tab and select the option of ‘On’.
Hit the button of ‘OK’ and
restart your system.
Now, open MS Outlook and leave it
while the application is reconfiguring the search engine.
Go back to ‘Control Panel’ and
then open ‘Programs and Features’.
Check the box of ‘Windows Search
Features’ and let it update the changes.
Once, the process is completed,
go back to the ‘Control Panel’.
Click on ‘Windows Indexing
Service’ and choose the ‘Advanced Option’.
Select the option of ‘Rebuild and
click on ‘OK’.
Let the process complete and
then, verify the indexing process.
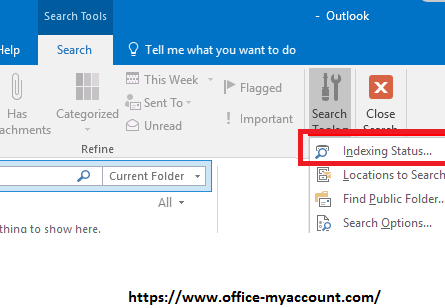
Press ‘Control’ and ‘F’ keys
together and open ‘Indexing Status’.
If the message, ‘Outlook has
finished indexing all the items’ pops up on your screen, this means the process
is completed.
Now, restart your system for one
last time to start afresh.
Once you have implemented all the
steps, open your Outlook account and search anything to check if the search
engine is working and if Outlook 2016 search is still not working, try the next
method.
Outdated versions of MS Office
often become the reason for technical glitches in an account. Outlook updating
can solve the unresponsive search function issue.
1. Check
updates in your version of Outlook.
For Outlook versions 2016 and
2013
Open Outlook and go to the
‘File’.
Click on ‘Office Account’.
Drop down the tab of ‘Product
Information’.
Select ‘Update Options’.
Click on ‘Enable Updates’.
Select ‘Update Now’ and hit the
option of any of the recent updates.
For Outlook versions 2010
Open Outlook and select ‘File’.
Navigate yourself towards ‘Help’.
Open ‘Check for Updates’.
Select the option of ‘Install
Updates’.
Select any of the available
updates.
Click on ‘Download’.
For Outlook versions MacBook
Start Outlook and find the option
of ‘Help’.
Click on ‘Check for Updates’.
Dropdown the option of ‘How would
you like to install the updates?’.
Select the option of
‘Automatically Download and Install’.
Open the list of ‘Check for
Updates’ and choose any recent update.
2. Once
the update has downloaded, click on the button of ‘Install’.
3. Run’ the new version
4. Restart
your system
After applying the steps, open
your Outlook account and search for a particular detail to get the results.
Solutions 3:
Repair Outlook
By repairing Outlook you can fix
many common Outlook issues including Outlook search not working on Mac. Read
the basic steps to repair Outlook with the help of built-in repair services.
Repair Outlook and fix your Outlook 2016 search not working issue
Open ‘Outlook Search Repair
Service’.
(If the option is not available
in your system, download it)
If any notification of duplicate
Outlook installation pops on your screen, remove it.
Restart your system.
Open the option of ‘Reindex’.
Let the service completely and
when you receive a ‘Reindexing has completed’ message, close it.
Repair Outlook and fix your Outlook 2010/ 2013 search not working issue
Press on ‘Start’ and open the
‘Control Panel’.
Scroll down the list of ‘View By’
and select the ‘Category’.
Scroll down the tab of ‘Programs’
and click on ‘Uninstall the Program’.
Click on ‘Microsoft Office’ and
hit the button of ‘Change’.
Choose ‘Repair’ or ‘Online
Repair’.
When ‘Control Window’ pops up
click on ‘Yes’.
Once the process is completed,
restart the system and you will see that Outlook 2013 search not working issue
has been fixed.
The crummiest thing that can happen to you is if you delete
an important email message in Outlook by mistake? Whether you just delete the
email or permanently purge it, it doesn’t disappear. We often delete unwanted
emails to clear the junk without knowing that we might want it later. But there
is nothing to worry about because the technological advancements enable you to
recover deleted email messages. If you want to restore the deleted emails and
look for some most effective ways that teach you how to recover deleted emails
in Outlook, then stop looking more. Here is a much detailed guide that comes in
handy, go through the guide, and recover the deleted emails. office.com/myaccount
How to Recover
Deleted Emails In Outlook From An Exchange Account?
If you have deleted an important email by a fault that is no
longer in your Outlook exchange account’s ‘Deleted Items’ folder, use the web
interface to the Outlook account and recover your deleted emails. Read and
follow the below-mentioned steps one by one to learn how to recover deleted
emails in Outlook.
Note: Users must take note that Outlook on Macbook does not
provide an interface to retrieve deleted email from an Exchange account.
If you are looking for the method of how to recover deleted
emails in Outlook Mac, this method will go.
Start the operating system and open Outlook Web App to log
in to your Exchange account in an internet browser
Once you are signed in, navigate yourself towards the
‘Deleted Items’ folder
Drop down the list in the folder and click on the ‘Recover
items deleted from this folder’
Emails will be sorted by the date they were deleted on.
Hover over the emails you would like to recover and select all of them by
‘Checking’ the box
Navigate yourself towards the middle of the window. There
will be three options. Click on the ‘Restore’
Once you follow all the aforementioned steps one by one you
will know how to recover deleted emails in Outlook. The recovered emails will
automatically move to its original folder from where you deleted the email.
How to Recover
Permanently Deleted Emails In Outlook 2013 On Windows?
office.com/myaccount
When we delete emails from the Outlook account, we think the
emails get deleted permanently but the emails move to the ‘Deleted Items’
folder. When you delete the email from the ‘Deleted Items’ folder as well, the
emails get permanently deleted. Such emails can be recovered after a period of
time, that span of time depends on the settings of ‘Exchange Administrator’. To
know how to recover deleted emails in Outlook 2013 on Windows, follow the
below-mentioned steps.
Open your Windows operating system and connect to the
Outlook 2013 Exchange account
Provide your valid Outlook login credentials and log in to
your Exchange account.
Move your cursor towards the ‘Home’ tab and navigate towards
the ‘Deleted Items’ folder
Choose the option of ‘Action’ and drop down the list to
further select the ‘Recover Deleted Items From Server’
There will be all the permanently deleted emails presented
in the list with the headers like ‘From’ and ‘Deleted On’, check the email you
would want to recover under the ‘Recover Deleted Items’
In case you want to recover all the permanently deleted
emails, navigate towards the bottom-left corner and click on ‘Selected All’
Now, navigate towards the bottom-left corner and click on
‘Restore Selected Items’ and click on ‘Ok’
Once you follow the aforementioned steps, your permanently
deleted emails will be recovered and stored in the ‘Deleted Items’. Now that
you know how to recover permanently deleted emails in Outlook, learn how you
can shift the recovered emails to any folder as per your wish.
Now, go back to the ‘Deleted Items’ folder and mark the
‘Recovered emails’ and right-click on it
Select the option of ‘Move’ and hit the button of ‘Other
Folder’ and drop down the list to choose the name of the folder
Select any one option from the ‘Inbox’, ‘Drafts’, ‘Sent
Items’ etc. and hit the button of ‘Ok’
After just a quick follow up on the aforementioned method of
how to recover permanently deleted emails in Outlook 2013.
How to Recover
Deleted Emails In Outlook From .PST Files?
A .pst file (Personal Storage Folder) by Outlook is given to
every user with 2GB, the users can store the copies of Calendar, Contacts,
Emails, Notes, etc. If the .pst file gets corrupted, you lose many imperative
items and also the chance to recover your deleted emails. Now, learn how to
recover deleted emails in Outlook by following the below-mentioned steps and
from your pst file.
Launch an Outlook pst file repairer and select the pst file
to recover it
You can search for the ‘pst file’ in the search box of your
Windows operating system if you are not aware of the location of the pst file.
Once the ‘PST file (Outlook)’ is opened, click on the button
of ‘Next’
Under the ‘Item Type’ all the types of the items stored in
the pst file will be presented such as Email, Calendar, Task, Journal, Notes,
Contacts, Distribution List
Select the button of ‘Email’ and click on ‘Next’
Here will be all the email messages stored that you have
deleted, the emails might be sorted by date. Select the emails you would want
to recover
Right-click on the highlighted emails and select the option
of ‘Save’ to recover
Provide the ‘Destination Path’ in the dialogue box and hit
the button of ‘Ok’
Your destination path has to be the folder you would want to
store the recover messages
The emails you have deleted will once have now been
recovered in the desired folder you mentioned as the destination path.
Once the emails have been recovered, you will be notified as
‘File saved at: E:\Steve Mike\Documents\PST\PST Repaired3.pst’ along with the
size of the file.
After following the above-mentioned steps, all the
highlighted emails will be stored in your desired folder.
Why Choose us for
Recover Deleted Emails in Outlook?
We hope all the aforementioned methods helped you in
recovering deleted emails or permanently purged emails in the Outlook email
account. The steps mentioned in the methods were easy to execute and do not
require an expert to perform. Still, if you are facing difficulty in
implementing any of them, start a conversation with our experts over a chat.
And let him teach you how to recover deleted emails in Outlook.
If you are a new user of Microsoft 365 Office, you need to add your
account to Www.office.com/myaccount. You can have a number advantage as a
consumer of Microsoft Products. The following advantages for Microsoft Product
consumer are: Renew your subscriptions
1. Access to your Cloud data
2. Make Payments
3. Update the application of MS Office
4. Manage/ Reset security settings
5. Buy new Office products
What is Office.Com/MyAccount?
Microsoft account offers get right of entry to to all Microsoft
applications, programs, and services. If you choose to use MS Office then, you
will have to create an MS Office account and log in to it by way of the use of
your credentials.
Your Microsoft Office account stores the information about what
product you have subscribed to along with the product key so that you can
retrieve your subscription whenever you want to.
Why Need an MS Office Account?
An MS Office account can provide you get right of entry to to its
software and services. You can at once signal in to Outlook mail, Windows,
Xbox, Gmail, and greater if you have a Microsoft Office account. With the
assist of your MS Office account, you can purchase new or renew ancient
subscriptions and operate many different tasks.
In order to control your Microsoft Office
account, you should go to the internet site of MS Office that is office.com/my
account. Enter your login
credentials and sign-in to your Microsoft account. Go to the ‘View Account’ and the complete
listing of the account settings will dropdown. Now, manipulate your Services,
Payments, Subscriptions, Status, and all the extra settings.
How to Check MS Office Subscriptions?
Visit the MS Office Login
website
Sign in to your account
with the login Password.
Navigate your self closer
to the upper-right nook and click on on ‘My Account’
Scroll down and click on ‘Subscriptions’
Under the same tab, read the details of your subscriptions.
How to Change Office.Com/MyAccount
Password?
Open the browser and visit account.microsoft.com/security/
Type your e-mail tackle and click on on the ‘Next’ choice
Enter your password and click on ‘Next’
Press on the
option of ‘Change my password’
Press on the ‘I don’t
have any of these’ tab and ‘Next’ respectively
You’ll be redirected to the verification page.
Enter your phone number
and click on ‘Next’
Provide the ‘Code’ you
acquired on your given telephone number
Enter your ‘New Password’
and re-enter the password to confirm it.
Finish the system of
altering the Microsoft workplace password with the aid of clicking on
‘Save’.
How Do I Recover My Microsoft Office
Account?
Have you forgotten the password for your MS Office e mail tackle
and can’t get admission to your account? No worries! Follow the below-mentioned
steps and get better your Microsoft Office account immediately.